Photo by Lenny Kuhne on Unsplash
If you’re a backup admin or a VI admin, chances are you’ve worked with PowerShell SDKs for tools like Veeam or VMware PowerCLI to automate repetitive tasks. This is what prompted us to take a closer look at Veeam’s existing PowerShell module. We decided to dedicate 24 hours of Veeam Annual Hackthon to enhance Veeam Backup and Replication using the REST API, making it more flexible and the top choice for those seeking advanced automation.
First thing first, Finding the Persona
Automation and scripting aren’t exclusive to admins handling backup/restore jobs or virtual machines. They’re valuable for various departments, including auditing, security, and compliance. For example, these departments may need to perform occasional tasks like listing jobs, ensuring policy compliance, or meeting service level agreements.
So, we understand the user personas for the PowerShell SDK. But why do we need a new SDK backed by REST API? Why not use the existing one?
Getting into the WHY
Before we dive into the WHY and HOW we did this hackathon project, lets first revisit how you can currently use the existing PowerShell SDK in VBR v12.
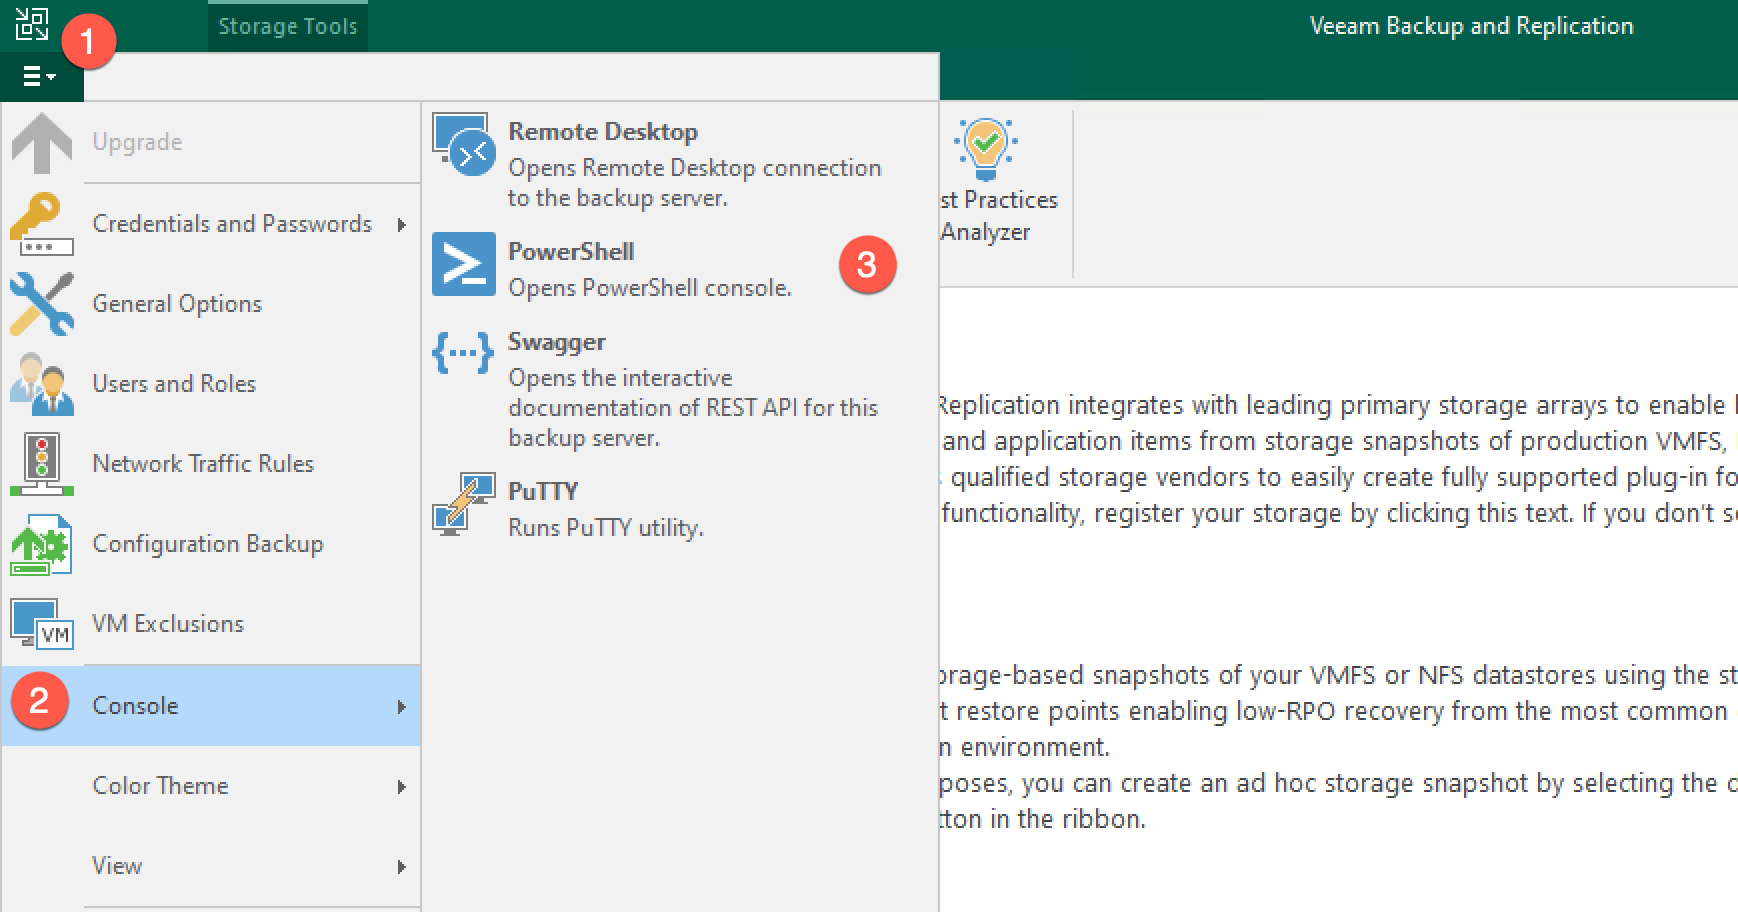
- Running Veeam PowerShell Session (locally) from Backup Server
Locally, on the backup server, navigate to the VBR UI, and from the main menu, select Console > PowerShell.
- Running Veeam PowerShell Session from Remote Machine
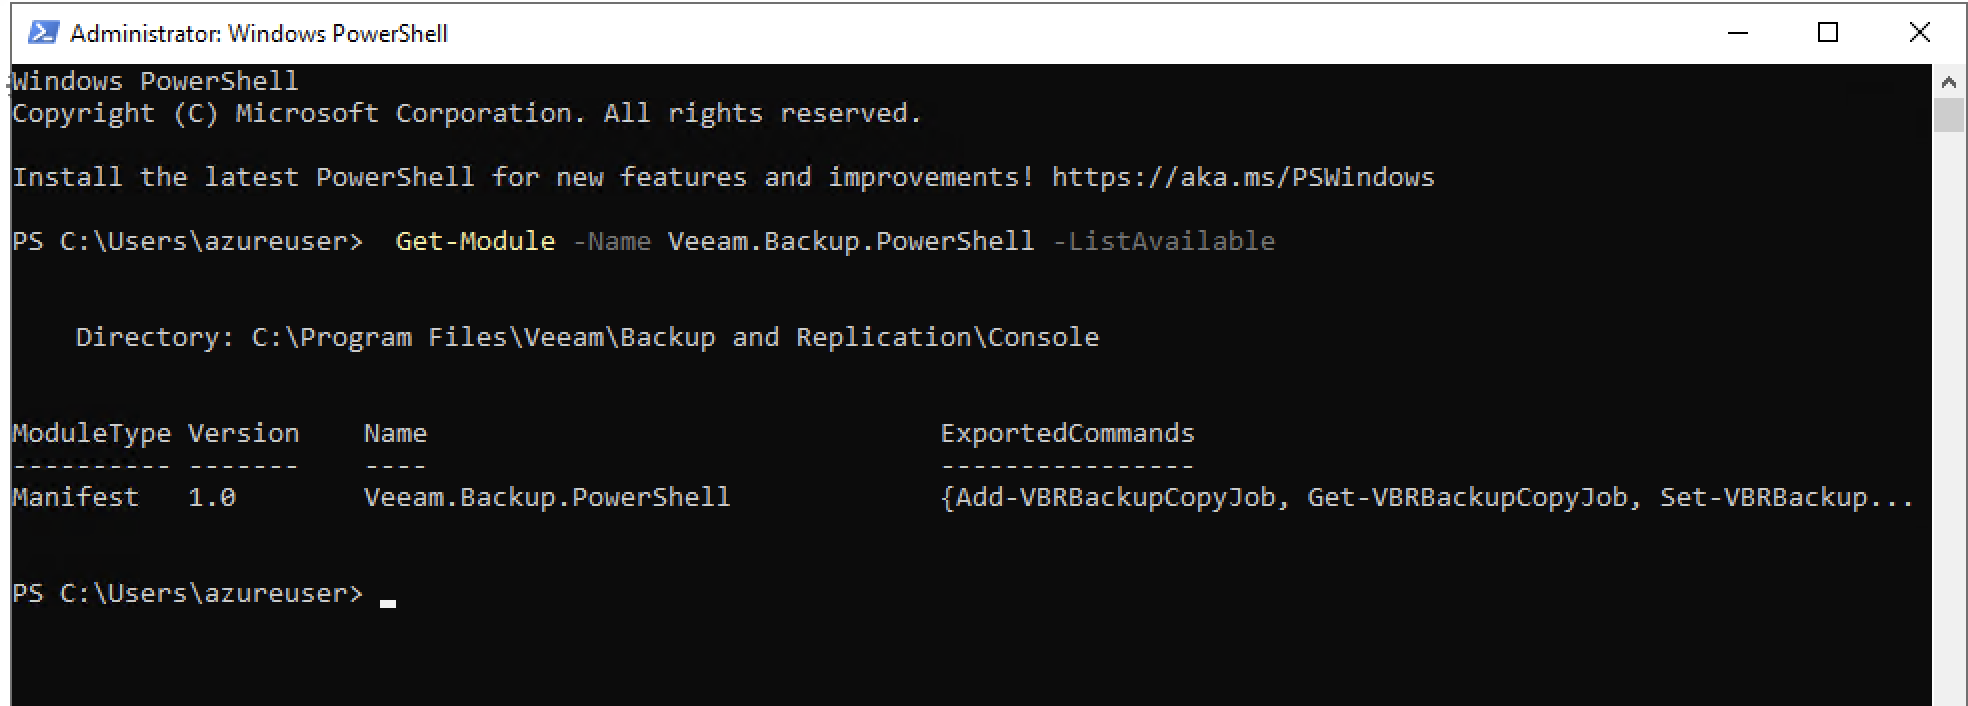
For running PowerShell session remotely, you must first have the VBR Console installed. After you install the VBR Console, Veeam PowerShell module will be installed by default.
You can verify the PowerShell module is installed on the machine by executing:
Get-Module -Name Veeam.Backup.PowerShell -ListAvailable
But wait, What is the Problem with the above methods?
- The remote machine from which you run Veeam PowerShell commands must have the VBR Console installed.
- Another issue is the PowerShell version compatibility, since the current modules talks directly to .NET framework.
- A third issue is, VBR console can only be install on Windows OS. No Linux or Mac support.
A new approach is needed!
The idea is to create a Veeam Powershell Module that leverages the REST API. The current behavior of the original module using the Veeam .NET Back-end is pretty inflexible. Benefits of taking the REST API Wrapper approach are:
- It is an API-First Approach, it can unify all the dev tools under one REST API version.
- No VBR Console is required.
- Install the Module on any client OS.
- Communicate over TLS to VBR Server API Endpoint. Default is 9419.
- Multiple VBR server connections in the same PowerShell session. Think about a unified monitoring/auditing.
How we managed to do it?
Simply by writing PowerShell Functions that use REST calls, then combining the functions into a module or modules. As an example, I will explain the process of writing the New-VBRConnection function.
- Every PowerShell function will be a REST call or more, we have used both the REST API reference documentation and swagger.
a. REST API Reference Documentation Link https://helpcenter.veeam.com/docs/backup/vbr_rest/reference/vbr-rest-v1-1-rev0.html?ver=120
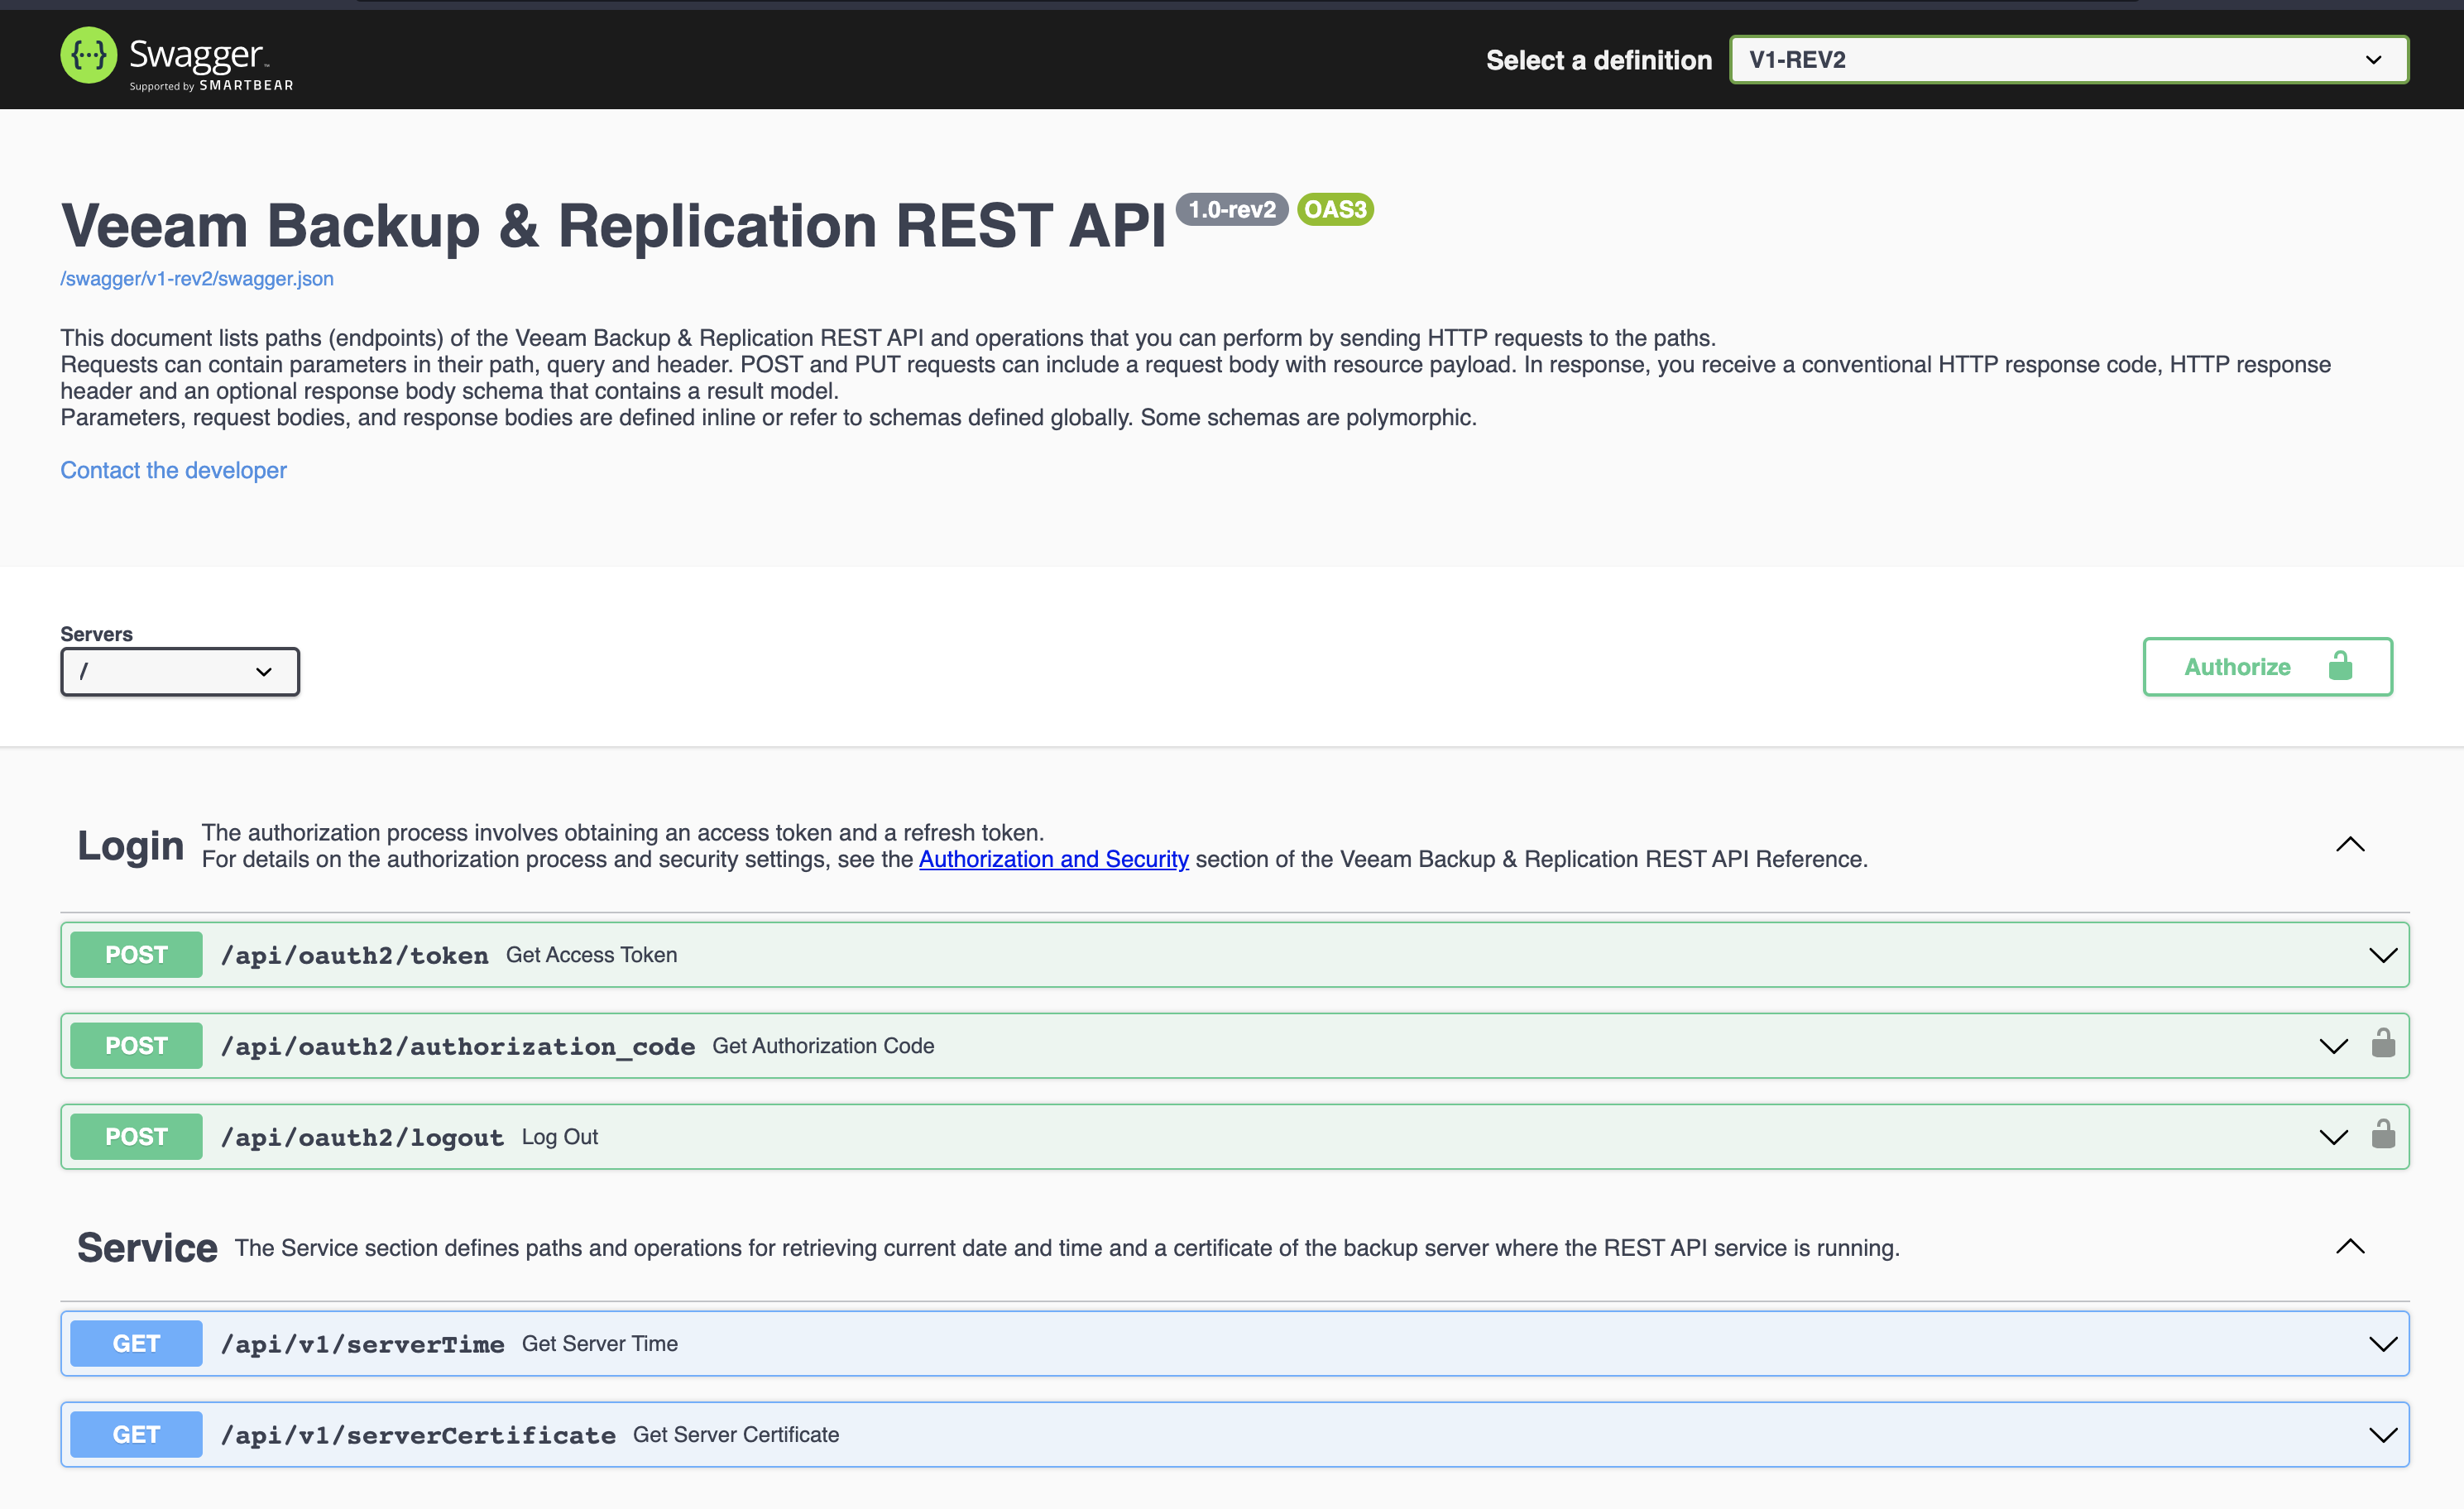
b. You can access the VBP Swagger documentation
https://<FQDN/IP>:9419/swagger/ui/index.html
-
For the New-VBRConnection function, an HTTP POST request was required /api/oauth2/token to get the token then store the token for future calls to get the connection.
-
To simplify the operation, we only used
"grant_type" = "password". -
Created the Module manifest, here is what I have executed to build the
.psd1and.psm1
$ModuleSettings = @{
    RootModule = './veeam-powershell-sdk.psm1'
    ModuleVersion = '0.1.0'
    Author = 'Adam Mazouz'
    Description  = 'This is a poc created for Veeam Community Hackathon'
    IconURI = '<veeam-logo>'
}

New-ModuleManifest @ModuleSettings -Path './veeam-powershell-sdk.psd1' -PassThru
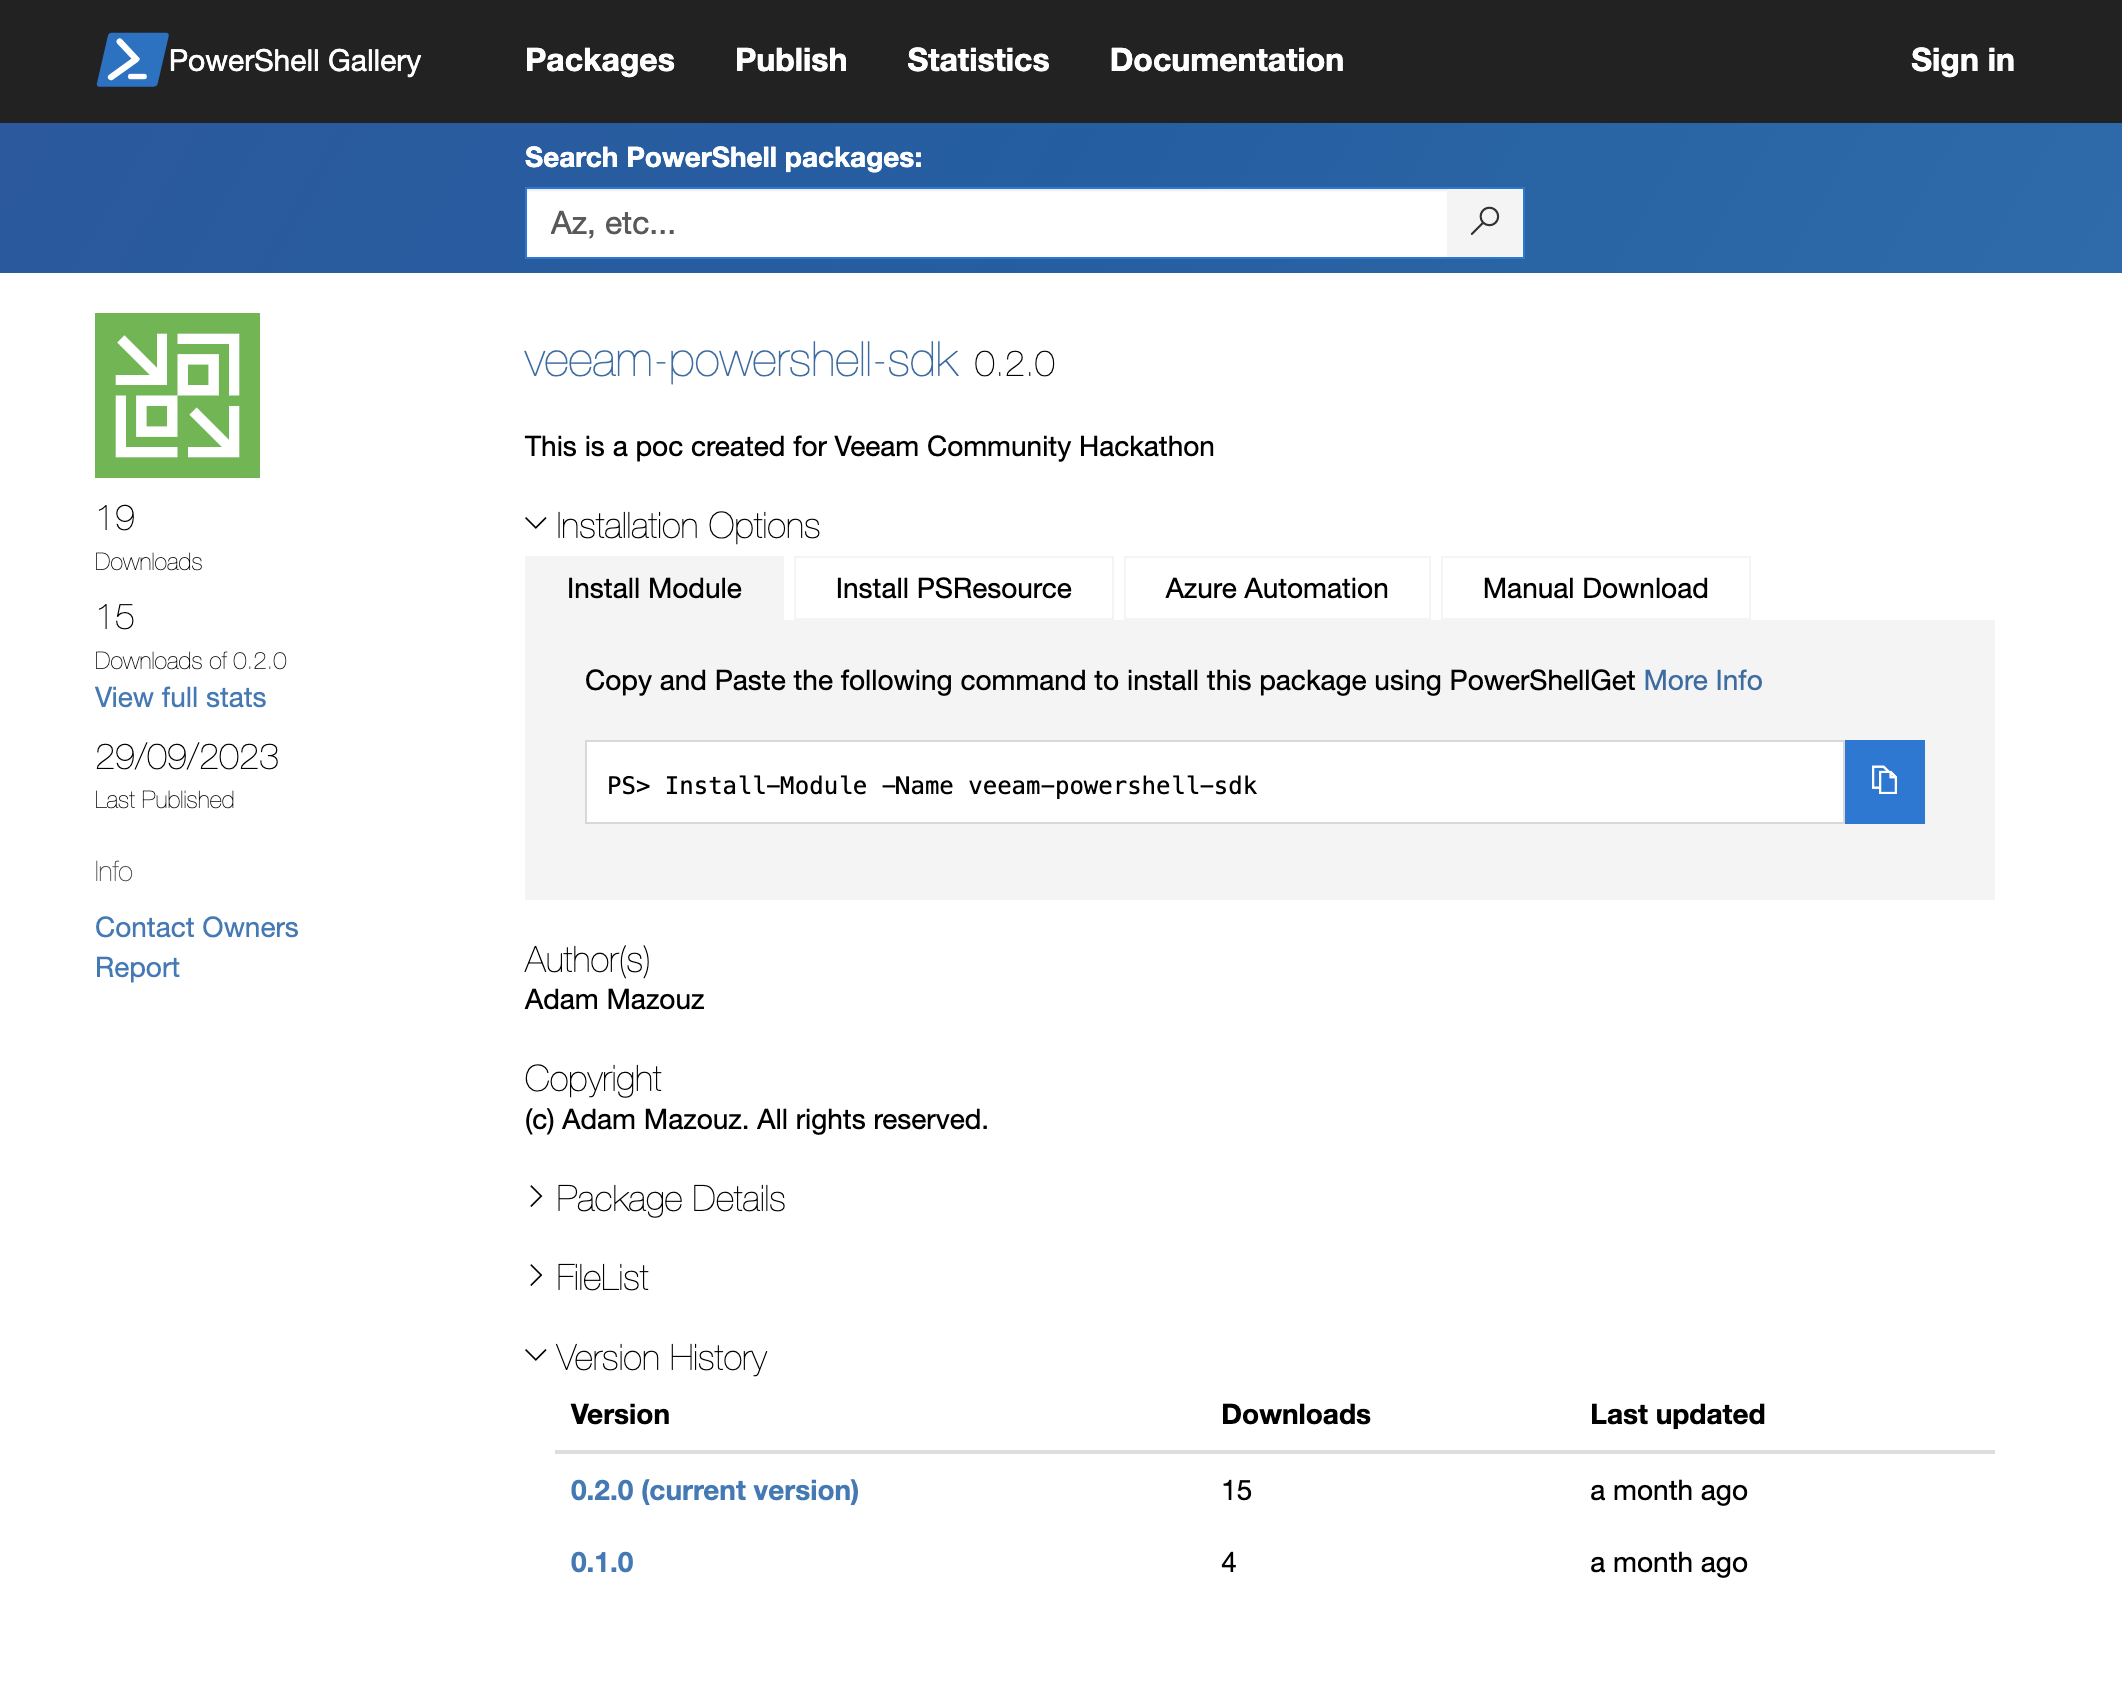
- Published the module on PowerShell Gallery, It is a simple task, you only need an account then generate an API key, after that execute this:
$APIKey = 'xxxxxxxxxxx'
Publish-Module -Path . -NuGetApiKey $APIKey
Here is a screenshot and a link for the published module: https://www.powershellgallery.com/packages/veeam-powershell-sdk/0.2.0
- Install the module on any machine with PowerShell install on it and has network access to VBR server.
install-Module -Name veeam-powershell-sdk
- Verify the module is installed
get-command -Module veeam-powershell-sdk
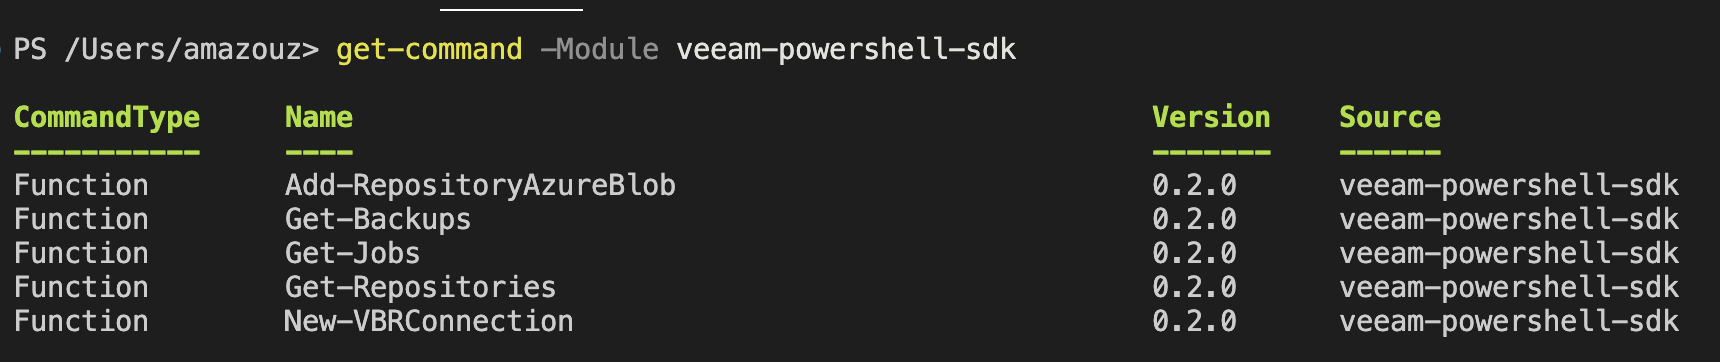
Note: Those are the only functions were completed at the end of the 24 hour hackathon deadline.
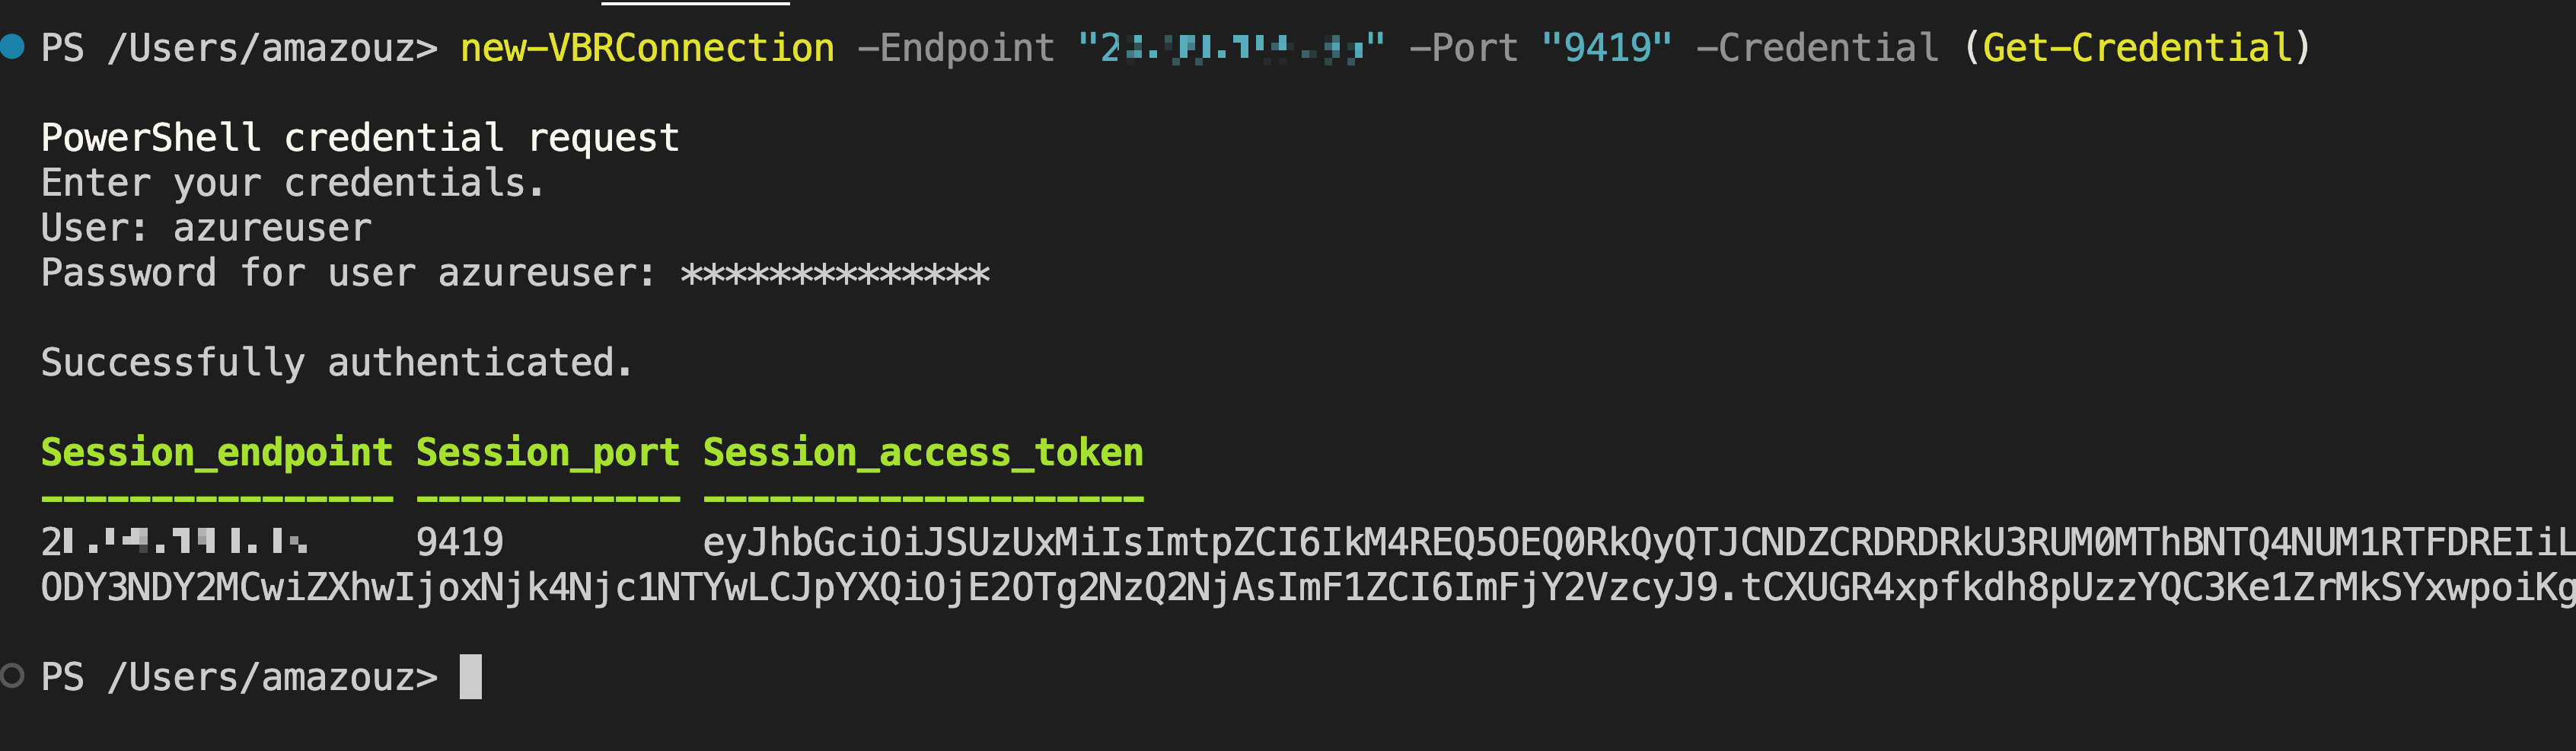
- Connect to VBR server with
New-VBRConnection
New-VBRConnection -Endpoint "<FQDN / IP>" -Port "9419" -Credential (Get-Credential)
The complete New-VBRConnection Function code
function New-VBRConnection {
    <#
    .SYNOPSIS
        Uses New-VBRConnection to store the connection in a global parameter
    .DESCRIPTION
        Creates a Veeam Server connection and stores it in global variable $Global:DefaultVeeamBR.
        An FQDN or IP, credentials, and ignore certificate boolean
    .OUTPUTS
        Returns the Veeam Server connection.
    .EXAMPLE
    New-VBRConnection -Endpoint <FQDN or IP> -Port <default 9419> -Credential $(Get-Credential)

    #>

    [CmdletBinding()]
    Param(

        [Parameter(Position=0,mandatory=$true)]
        [string]$Endpoint,

        [Parameter(Position=1,mandatory=$true)]
        [string]$Port,

        [Parameter(Mandatory=$true,ParameterSetName="Credential")]
        [ValidateNotNullOrEmpty()]
        [Management.Automation.PSCredential]$Credential

    )

    $apiUrl = "https://$($Endpoint):$($Port)/api/oauth2/token"

    $User = $Credential.UserName
    $Pass = $Credential.GetNetworkCredential().Password

    # Define the headers for the API request
    $headers = @{
        "Content-Type"  = "application/x-www-form-urlencoded"
        "x-api-version" = "1.1-rev0"
    }

    ## TO-DO: Grant_type options
    $body = @{
        "grant_type" = "password"
        "username"   = $User
        "password"   = $Pass
    }

    # Send an authentication request to obtain a session token
    try {
        $response = Invoke-RestMethod -Uri $apiUrl -Headers $headers -Method Post -Body $body -SkipCertificateCheck

        if (($response.access_token) -or ($response.StatusCode -eq 200) ) {
            Write-Host "Successfully authenticated."
            $VBRAuthentication = [PSCustomObject]@{
                Session_endpoint       = $Endpoint
                Session_port           = $Port
                Session_access_token  = $response.access_token
            }

            return $VBRAuthentication
        }
        else {
            Write-Host "Authentication failed. Status code: $($response.StatusCode), Message: $($response.Content)"
        }
    }
    catch {
        Write-Host "An error occurred: $($_.Exception.Message)"
    }
}
What are the Obstacle we Faced?
Even thought we won and managed to pull this off withonly three team members, doesn’t mean we didn’t get into any trouble. To call out a couple of obstacles:
-
It was a 24 hour hackathon, so we had less time to code and more time to think about a project and design it. However, I am happy with the final results and the state of the published modules.
-
SSL/TLS self-signed certificate was a bit hacky, and we had to find a workaround to skip the certificate for the sake of development.
-
Since I am using MacOS for the development of the modules, it was not an as straightforward process to publish to the PS Gallery due to .dotnet requirement, which was another fun thing to tackle.
Some Links and References
-
Veeam Community Hackathon Results https://community.veeam.com/automation-desk-103/1st-annual-veeam-community-hackathon-results-5838
-
VBR RestFul API Documentation https://helpcenter.veeam.com/docs/backup/vbr_rest/overview.html?ver=120
-
PowerShell Modules: Build and Deploy - PSake (https://github.com/psake/psake)
-
PowerShell Modules Unit Testing - Plaster (https://github.com/PowerShellOrg/Plaster)
-
Project GitHub Repo https://github.com/VeeamCommunity/veeamcommunity-2023-Team-2
-
Project PowerShell Gallery https://www.powershellgallery.com/packages/veeam-powershell-sdk
Thank you Veeam Community team for this amazing experience, and a special thanks to Markus Kraus, who helped a lot with his Veeam and PowerShell expertise designing and pushing the “go live” button for this project. I am already looking forward to 2nd annual hackathon next year. Go Go Team 2!!
comments powered by Disqus